Thursday, August 9, 2012

BIG BOY BEDROOM- COMPLETED!

Wow! I never thought it would come to an end.

I was determined to make a personalized bedroom for our little boy and I think (think!) I accomplished just that.

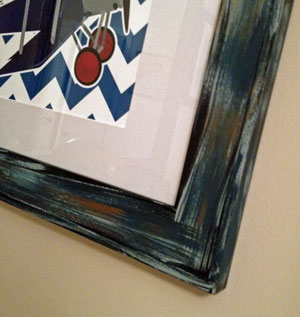
Overall, we probably spent about $400 on the entire bedroom. This includes the overly priced toddler rails that keeps them from rolling out (conveniently pictured for you! Honestly, I didn't wanna take the time to remove them for the picture!). It also included the cost of the sheets and bed spread bought from Target. And, the nifty airplane blanket, and two airplane pillows bought from Amazon.com (for a REALLY good price!). The other larger "block" pillow I made myself- a simple pattern, but cute.

A few other things we bought:
- A small globe for the dresser
- A shelf and clock for the wall

The things we already had, thus our low  overall cost:
- Mattress
- Nightstands
- Dresser & mirror
- Lamps

If you've followed our entire progress, thanks for your time!

If you're new to what we've done, have fun looking over the past 5 posts. They'll keep you pretty entertained as we have become those CRAZY parents who will do anything for our children. No matter how much sanding and staining is involved.

Oh, I forgot to mention that we put together a 9,000 piece balsa wood model plane to hang from the ceiling. That's not pictured because I've yet to hang it. It took A LOT of time to put together and I'm 100% afraid that my 100% boy will tear it into 9,000 shreads.

Have a fantastic day!!!!
Erica


Thursday, August 2, 2012

BIG Project - Little Boy...Post #5

The final stretch is in sight!

This post= Embellishments.

Pictures:
1) I bought these prints from Etsy.com and the vendor "Paper Llamas"- she was Fabulous and highly recommended. She custom does the prints to match the colors of your room. They were $40 for the 4 piece set but they are printed on high quality canvas paper. They were our "splurge" for the room. But, worth it!
2) I bought the frames at the Dollar Store. Yes! The Dollar Store. They were bland and black, but that can be fixed with a little paint! I used brown, blue, black and gold to give them a personalized look. I think they turned out great!


"G":
1) I bought a wooden white letter "G" at Michaels. They're pretty cheap.
2) I found this nifty fabric in the scrapbooking section for $1.99- traced around the G and exacto knife cut the perfect shape.
3) Welcome back E-6000 glue. It'll hold anything together!


Night stand blocks:
1) I bought two sheets of scrapbook paper- one in a map motif and one with crazy numbers.
2) I printed out clip art of a plane and then the letters "FLY", used them as a template, and exacto knife cut these out of the scrapbook paper.
3) E-6000 glue came into play, AGAIN, and I glued the paper to left over cedar boards from the signs I created for the room.
4) They sit up nice and pretty all by themselves on the night stands.

The end...yeah- that'll be covered next week.


Thursday, July 26, 2012

BIG Project - Little Boy...Post #4

Do projects for our kids ever end? I'm believing- NO!

Here is project #4 for the man of the house...well, little man of the house. We better keep daddy as the main man of the house ;)

THE BOX!

We were cleaning out my parent's pool shed and look at what we found! An old speaker storage case. My dad was in a gospel quartet in his younger years and he had this box from when they would travel. He was going to throw it away- it was an ugly blue- but I thought...I can SAVE THIS!

Again, we had to cure the ugly blue syndrome. This was done using Rust Stop primer. Why? Because I didn't want it to be shiny! I wanted a rustic luggage looking box. And, I accomplished just that!

It took some time to paint to make sure that we didn't cover any of the pretty silver embellishements.

Once it dried, I painted "Gage Preston Airlines" using the same antiqued white as the cedar signs.

I bought vintage luggage tags (adhesive ones) from Amazon.com for $10.00. There were 20 in the box! And, I think they're super cool looking!

Gage loves the box. He especially loves to hide in it.

So far, no toys are kept in it- it's a little hard to open. But, give that a few more months, he'll master the lock and key ;)

Hope you love it as much as we do!


Thursday, July 19, 2012

BIG Project - Little Boy...Post #3

While this is week 3 of the Big Boy Bedroom sequence, this is the MAIN project and has been going on for quite some time...NOT for the faint of heart!

This is the headboard- the focus- the death of this mama!

I thought it looked cool to have a pallet headboard. What I didn't think was cool was sanding that sucker for hours upon hours to make sure that my little sweetie didn't have any splinter hazards!

Here's how I built the masterpiece:
1) Find a pallet (this was easy, again, for me since we own a lumber company. But I'm pretty sure they're easy to come by anywhere!)
2) SAND...SAND...SAND...SAND...if you don't have an electric sander- stop now. Get one.
3) Sand some more...
4) Stain it- I used American Century Classic by Minwax. Love it.
5) Seal it with a nice poly- I used a satin finish because I didn't want the shine.
6) Create a "base" for it. This isn't pictured and isn't required if you're going to secure it to the wall, but I didn't want any more holes than necessary in his room. (I'm sure more holes will occur in his walls via being a boy as time rolls on).
7) Attach the bed frame. A twin size bed fits the pallet PERFECTLY.
8) Stand back and be proud- of the sanding, of course.

Again, we love it. Hope you do too!

Feel free to ask questions in the comment box below. I'll help as best I can.


Thursday, July 12, 2012

BIG Project - Little Boy...Post #2

Welcome to week #2, post #2, project #2 in the Big Boy Bedroom saga!

This week's project: THE Bulletin Board.

I started with a plain 'ol cork bulletin board found at Staples for $9.99. I bought a large antiqued map off of Amazon for $4.99 and got to work!

TO DO:
1) Cut the map to size
2) Use brown/black/gold paint to antique the edges of the bulletin board if you're going for the antiqued look
3) Use adhesive glue (I use E-6000) and glue that puppy to the cork board
4) Start getting "items" together to place on the board.

For my items:
- I bought this cool little Telegram made especially for the little man from telegramstop.com (how cool!!)
- I found this neat little card with one of our favorite sayings "I love you to the moon and back"
- I made a "You Are My Sunshine" tag
- I created thumbtacks using Scrabble letters and that handy E-6000 glue

I LOVE LOVE LOVE how it turned out. I hope you do too!


Thursday, July 5, 2012

A BIG project for a little boy...the first of many posts...

So- I'm baaaaack! It's been a few months (sorry)- life just got really busy and honestly I couldn't think of interesting things to blog about. However- the big boy is almost 2 so I have LoTs to talk about now as we plan for his big birthday bash, create his new big boy bedroom, and start potty training (yikes!).

Thanks to Pinterest, his big boy bedroom was conceived. I will be posting on all of the different projects that went into creating the perfect "antique airplane suite"- there were about a zillion of them.

If you have questions about products I used or techniques, leave a comment. I'll be more than happy to share.

Here is info about project #1: antiqued signs (to be hung via chain on the walls in the new bedroom) - we cut a 1x6x10' cedar plank into random lengths but all around the 26" mark. We then nailed them to 3' long 1x4 cedar planks (this was easy access for me since we have a lumber company- but lowes would carry these items too and may even help you cut them!) - I then stained the signs in American Classic stain - let them air dry for 1 week - began painting my saying and hand drawing the plane. I painted with an off white acrylic to keep that vintage feel (special side note: to mark where you want to paint, use chalk! It's easily removed with a dab of water!!). - We screwed in cabinet door pulls and attached 50lb test chain. We bought special anchors to attach them to the walls, and we were sure to find the studs because these suckers were HEAVY! 

I hope you love them as much as I do!!! More bedroom stuff to come...as it gets done. Remember- I'm a full time employee, full time mama and full time wife. Being a full time craftsman just doesn't always make the top of the to-do list! Have a great day!!!


Wednesday, February 8, 2012

When you say "free food"....

Every time that the words "free food" are uttered in any way, the human tendency is to perk up their ears and turn your head. Here in the South, churches with Homecomings are always packed. Also in the South, tailgates are always packed.

What else is packed? The WONDERFUL restaurants that offer free food! My husband and I were just talking last night about different free food offers.

Here are a few that I have recently used...and one that I plan to use.
- Chick-fil-A: there are some locations that are still participating. It was in our hometown 2 weeks ago and yes, we were there first thing in the morning to get our chicken biscuit! Also, on this website you can sign up to be the first to know when Chick-fil-A has special offers in your area.
- Subway: this one isn't still usable, however you can still sign up to know when new offers are available. We used this one last week and the English muffin breakfast sandwich is fabulous!
- Brewster's Ice Cream: LOTS of free ice cream (or discounted) options on this website! Check them out! I'm planning on taking advantage of this one.
- FreeFly*s: so, this isn't food per se, but its still FREE!

Free makes me happy- hope it does you too,
Erica